Showing posts with label custom categories. Show all posts

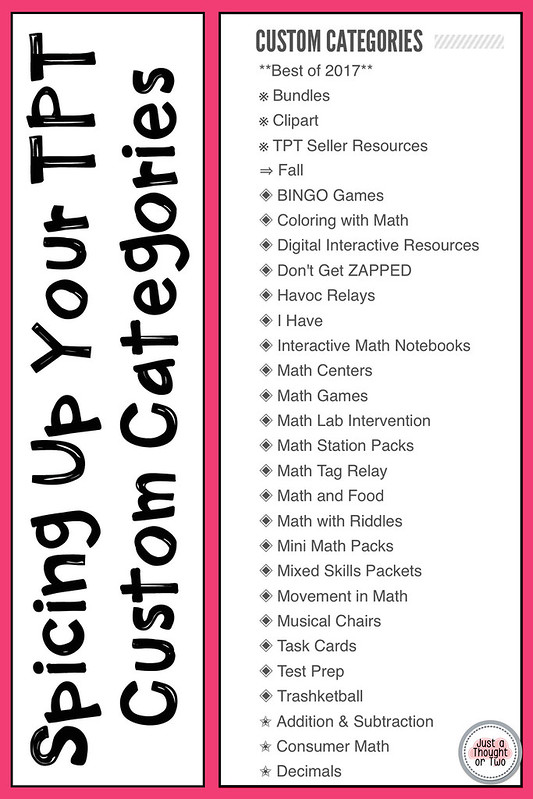
Spicing Up Your TPT Custom Categories


If you don't have Custom Categories in your store, be sure to check out this post first.

Now that you have a lot of Custom Categories, you probably want them to be organized. I know I certainly needed some organization. I combined my need for organization with my love of bullet points!

✔  ☺ ❖ ✎ ➸ ⓵ ☑ ⇒ ☞ ✔  ☺ ❖ ✎ ➸ ⓵ ☑ ⇒ ☞ ✔  ☺ ❖ ✎ ➸ ⓵ ☑ ⇒ ☞ 


The bullet points I'm referring to are symbols created using HTML code. Don't worry you do not need to do any coding! All you need to do is copy & paste. You only need to know the code number for organization purposes because Custom Categories are listed in numerical and alphabetical order.

So let's get started!

Step 1: Decide how you want your Custom Categories organized. This can be by grade level, by subject, by skill, etc. Need some basics on setting up Custom Categories? Click here for this post.

Step 2: Decide on which fabulous bullet points you want to use. I have a couple of sites that I like to use. I love this site - Copy Paste Character - but it does not have the HTML code numbers so it takes a little work to get it right on order. Another site I use is Sabina Noire.

**Categories are listed in numerical order and then alphabetical. So if you use ◈, it will show up before ➯  because of the HTML code number. If you don't have the numbers, it will be trial and error.

Step 3: From the drop down menu go to My Product Listing.
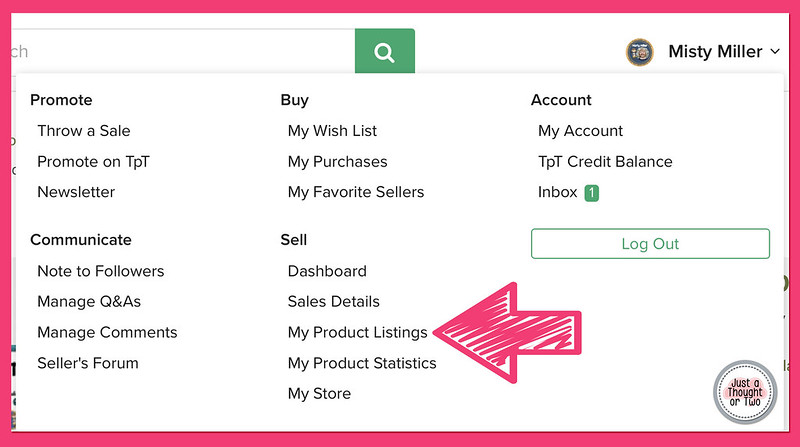

Step 4: Click on Manage Categories


Step 5: Click on each category name and copy/paste the bullet point that you want the category to start with. I do put a space between the symbol and the category name. Be sure you are adding the symbol itself and NOT the HTML code.


Step 6: Don't forget to click on SAVE at the bottom.

Remember that changes to your store can take up to an hour. If you don't like the arrangement, go back in and edit until you get it the way you want it.

Help Your Buyers with Custom Categories

Help Your Buyers with Custom Categories - Create Categories
Once you have more than one page of products, it's time to start creating Custom Categories. These will help you sort your products into categories and help potential buyers find what they need in your store.

Creating Custom Categories
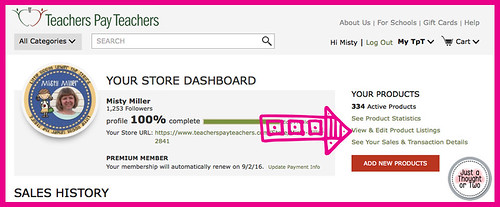
From your Dashboard, go to View & Edit Product Listings.
Help Your Buyers with Custom Categories - Create Categories


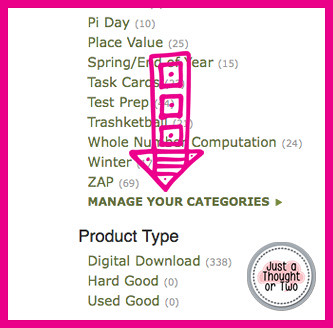
Locate Manage Your Categories
Help Your Buyers with Custom Categories - Create Categories

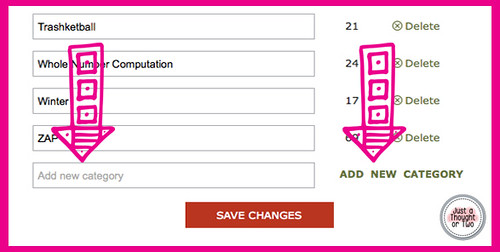
From this screen, you can add custom categories, change their name, or delete a category. To add the category, type a category name in the box and click Add New Category. Once you are finished adding categories, click on Save Changes.
Help Your Buyers with Custom Categories - Create Categories

Now it's time to add products to your categories. Go to the View & Edit Product Listings page.

Click Quick Edit on the first product you want to add.
Help Your Buyers with Custom Categories - Create Categories

On the side, you'll see a box of your categories. Click on the category you want to add the product to and click Update.
Help Your Buyers with Custom Categories - Create Categories

Other Info:
If you want to add the product to more than one category,
Mac - Hold the Command Key down while you click on each category you want.
PC - Hold the CTRL Key down while you click on each category you want.

 On the Category names, you can start them with a number or a bullet point. Otherwise, the categories will appear in alphabetical order. More information on Spicing Up Your TPT Custom Categories.

 You are allowed quite a few categories (maybe 50 or 60). Just be sure the categories you use are relevant and helpful.

 If you hyperlink a category in your product description and then change the category name, the link will not work.

 Categories take awhile (an hour or two) to show up in your store. All categories must have at least one product assigned to it or it will not show up.