Showing posts with label tpt store. Show all posts

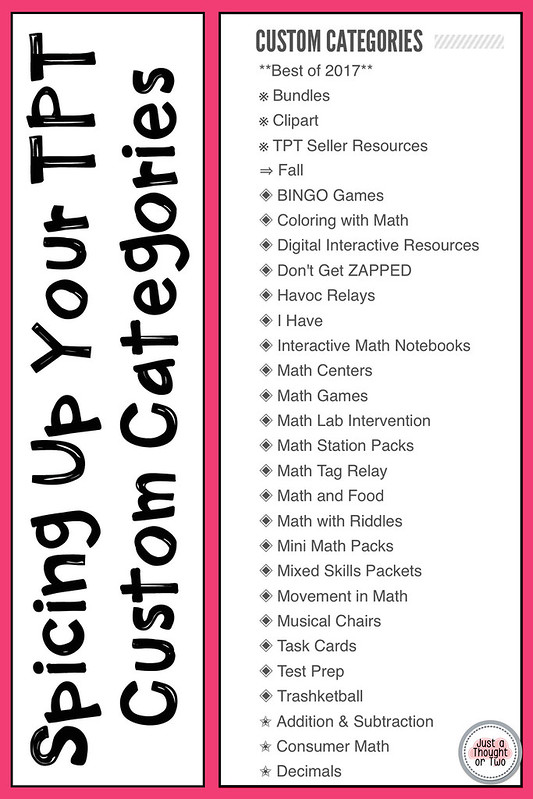
Spicing Up Your TPT Custom Categories


If you don't have Custom Categories in your store, be sure to check out this post first.

Now that you have a lot of Custom Categories, you probably want them to be organized. I know I certainly needed some organization. I combined my need for organization with my love of bullet points!

✔  ☺ ❖ ✎ ➸ ⓵ ☑ ⇒ ☞ ✔  ☺ ❖ ✎ ➸ ⓵ ☑ ⇒ ☞ ✔  ☺ ❖ ✎ ➸ ⓵ ☑ ⇒ ☞ 


The bullet points I'm referring to are symbols created using HTML code. Don't worry you do not need to do any coding! All you need to do is copy & paste. You only need to know the code number for organization purposes because Custom Categories are listed in numerical and alphabetical order.

So let's get started!

Step 1: Decide how you want your Custom Categories organized. This can be by grade level, by subject, by skill, etc. Need some basics on setting up Custom Categories? Click here for this post.

Step 2: Decide on which fabulous bullet points you want to use. I have a couple of sites that I like to use. I love this site - Copy Paste Character - but it does not have the HTML code numbers so it takes a little work to get it right on order. Another site I use is Sabina Noire.

**Categories are listed in numerical order and then alphabetical. So if you use ◈, it will show up before ➯  because of the HTML code number. If you don't have the numbers, it will be trial and error.

Step 3: From the drop down menu go to My Product Listing.
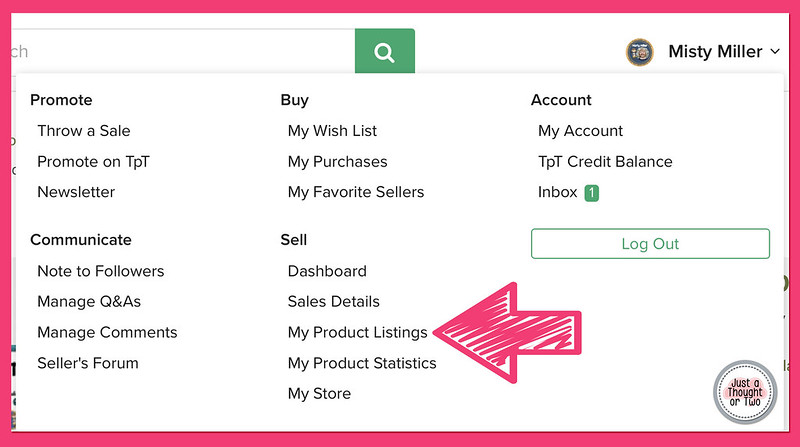

Step 4: Click on Manage Categories


Step 5: Click on each category name and copy/paste the bullet point that you want the category to start with. I do put a space between the symbol and the category name. Be sure you are adding the symbol itself and NOT the HTML code.


Step 6: Don't forget to click on SAVE at the bottom.

Remember that changes to your store can take up to an hour. If you don't like the arrangement, go back in and edit until you get it the way you want it.

Dressing Up the TPT Quote Area: Rotating Banner

Dressing Up the TPT Quote Area Part 2 Rotating Banner, Quote Area

In my original post on Dressing Up the TPT Quote Area, I talked about how to add just one image to the area. In Part 2, I'm going to give you some directions for adding several images to your quote area that will rotate.


First, create your images that you would like to add to your quote area. The size is a 3:1 ratio. So you could use something like 6 by 2 inches. The matching background gray color is #f1f1f1.

I chose to start with 3 images but will probably add a couple more. Here are my images:
 Dressing Up the TPT Quote Area Part 2 Rotating Banner, Quote Area

Dressing Up the TPT Quote Area Part 2 Rotating Banner, Quote Area

Dressing Up the TPT Quote Area Part 2 Rotating Banner, Quote Area

Upload the images to an online GIF maker. I used GIFMaker.me.
Dressing Up the TPT Quote Area Part 2 Rotating Banner, Quote Area 
In GIFMaker.me, click the UPLOAD IMAGES button and choose your images.
 On the control panel, be sure your size is set to 450 px by 150 px.
Also on the control panel, you will set the speed. Mine is set at 5000 milliseconds (5 seconds). You don't want it too slow or too fast.
 Click on Create GIF Animation.
 Under the black buttons, click Download GIF.

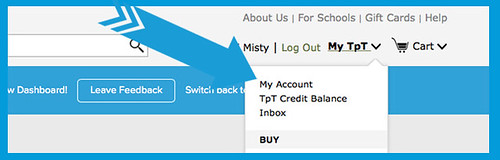
Go to My Account
Dressing Up the TPT Quote Area Part 2 Rotating Banner, Quote Area
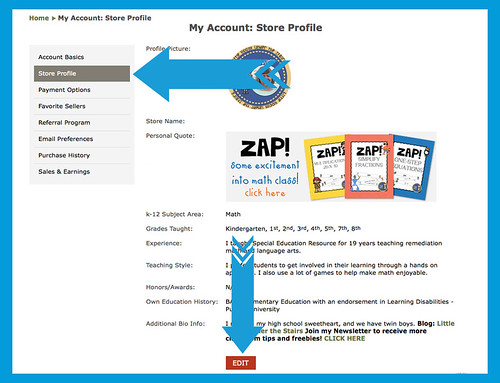
Click on Store Profile and then Edit
Dressing Up the TPT Quote Area Part 2 Rotating Banner, Quote Area

Change or add in the Personal Quote box
 Make sure Image/Link is selected. Click on Choose File and select your GIF from your computer.
 You can link this image to new products in your store, a custom category, or a specific product. The rotating banner only allows for one link which is put into the box where it says "Select a URL that your image will link to". You can use a link shortener for this link's URL.

Click Save and you are finished! Now you have a rotating banner in your quote area.

If you have any questions, please feel free to ask!

Dressing Up the TPT Quote Area

Dressing Up the TPT Quote Area

In your quote area (the gray box beside your logo), you can do several things.
You can:
✍ put a quote
✍ put a link to your blog, Pinterest, FB, etc {Just be aware that doing this does mean that potential buyers leave your store.)
✍ put an image
✍ put multiple images into a GIF


Today I'm going to talk about putting in an image - just one photo that doesn't move.

First, create an image that you would like to add to your quote area and upload it to a draft blog post in Blogger, a secret board on Pinterest, or a photo site such as Flickr or Tinypic. The size should be about 450 pixels by 150 pixels (1.5 inches by 0.5 inches at 300 ppi). The matching background gray color is #f1f1f1.
Dressing up the TPT Quote Area

Go to My Account
Dressing Up the TPT Quote Area

Click on Store Profile and then Edit
Dressing Up the TPT Quote Area

Change or add in the Personal Quote box
Dressing Up the TPT Quote Area
☞ From your photo site you want the code that is your image. It should start with https and end with jpg. In Flickr, you will have to pull it out of the Embed Code and for Photoshop it is the Direct Link.
☞ You are only allowed 120 characters in the Personal Quote box, so you need to put your image code into a link shortener such as bit.ly.
 You can link this image to new products in your store, a custom category, or a specific product. Also, use a link shortener for this links URL.
 In your Personal Quote box, you will put this HTML code replacing with your links from above.
<a href=YOUR LINK><img src=YOUR IMAGE LINK></a>

Click Save and you are finished!

Help Your Buyers with Custom Categories

Help Your Buyers with Custom Categories - Create Categories
Once you have more than one page of products, it's time to start creating Custom Categories. These will help you sort your products into categories and help potential buyers find what they need in your store.

Creating Custom Categories
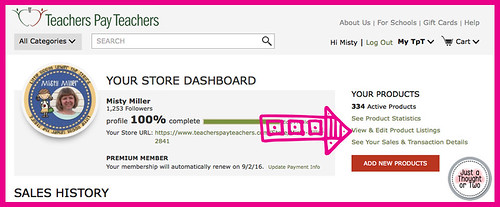
From your Dashboard, go to View & Edit Product Listings.
Help Your Buyers with Custom Categories - Create Categories


Locate Manage Your Categories
Help Your Buyers with Custom Categories - Create Categories

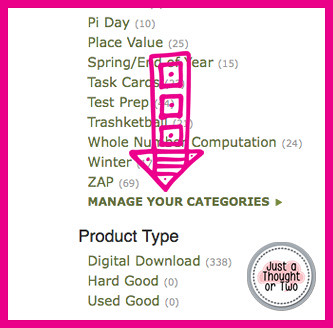
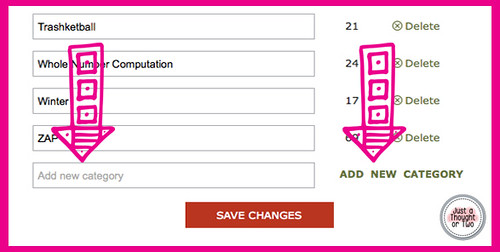
From this screen, you can add custom categories, change their name, or delete a category. To add the category, type a category name in the box and click Add New Category. Once you are finished adding categories, click on Save Changes.
Help Your Buyers with Custom Categories - Create Categories

Now it's time to add products to your categories. Go to the View & Edit Product Listings page.

Click Quick Edit on the first product you want to add.
Help Your Buyers with Custom Categories - Create Categories

On the side, you'll see a box of your categories. Click on the category you want to add the product to and click Update.
Help Your Buyers with Custom Categories - Create Categories

Other Info:
If you want to add the product to more than one category,
Mac - Hold the Command Key down while you click on each category you want.
PC - Hold the CTRL Key down while you click on each category you want.

 On the Category names, you can start them with a number or a bullet point. Otherwise, the categories will appear in alphabetical order. More information on Spicing Up Your TPT Custom Categories.

 You are allowed quite a few categories (maybe 50 or 60). Just be sure the categories you use are relevant and helpful.

 If you hyperlink a category in your product description and then change the category name, the link will not work.

 Categories take awhile (an hour or two) to show up in your store. All categories must have at least one product assigned to it or it will not show up.